Loading...
Testing with Cypress
Cypress Documentation: https://www.cypress.io/
The Cypress documentation is clear and comprehensive, so I’ll focus mainly on configuration and practical setup details.
Installation
npm install cypress --save-dev
(You can also download the files directly from their website and install them in your project.)
After the installation, add the following script to your package.json file.
json
1"scripts": {2 <...>3 "cypress:open": "cypress open"4}5
You can also use:
"cypress:run": "cypress run"
which executes the tests immediately.
I prefer using cypress open because, after launching the Cypress UI, there is no need to restart the test runner every time. You can see all errors, inspect commands, and trace the element selectors being used.
Start Cypress with:
npm run cypress:open
The following window will appear:
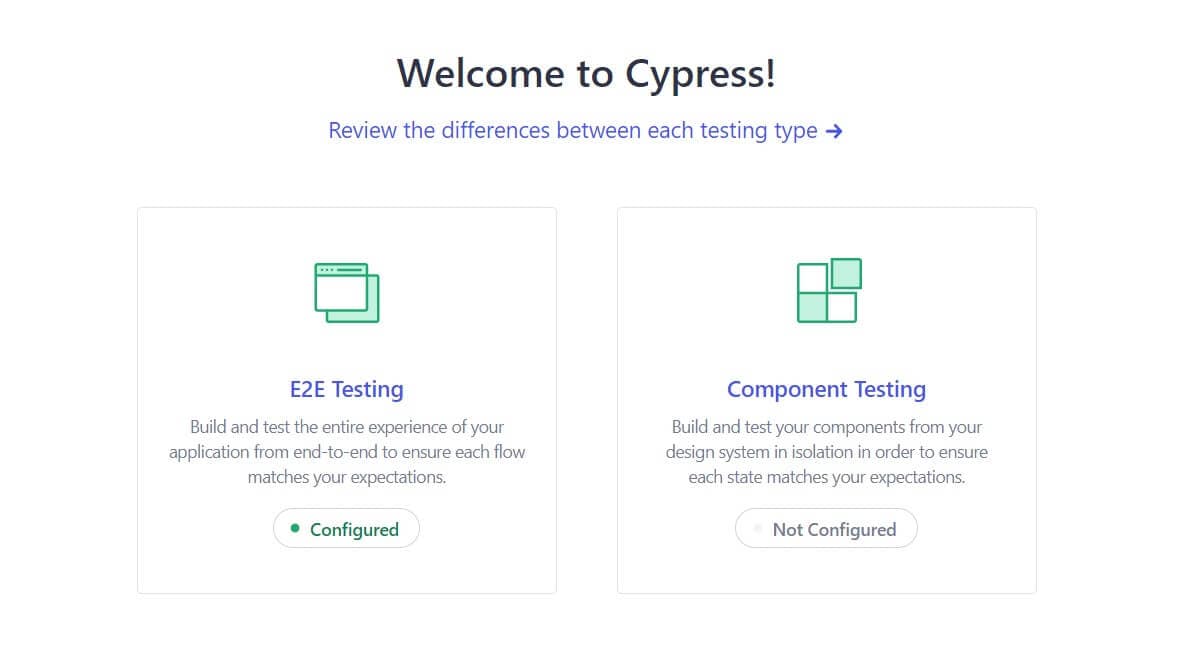
Select the required testing option and the browser. After that, all necessary files and folders are created in the project.
You can then start writing tests.
In the configuration file, you can specify a path different from the default cypress folder.
My configuration file looked like this:
JavaScript
1import { defineConfig } from "cypress";2const supportFile = 'tests/e2e/support.js';34export default defineConfig({5 fixturesFolder: "tests/e2e/fixtures",6 screenshotsFolder: "tests/e2e/screenshots",7 videosFolder: "tests/e2e/videos",8 chromeWebSecurity: true,9 viewportWidth: 1366,10 viewportHeight: 850,11 e2e: {12 setupNodeEvents(on, config) {13 // implement node event listeners here14 },15 baseUrl: 'http://localhost:3000/',16 specPattern: 'tests/e2e/specs/**/*.{js,jsx,ts,tsx}',17 supportFile,18 },19 env: {20 coverage: false21 },22 defaultCommandTimeout: 30000,23 pageLoadTimeout: 30000,24 requestTimeout: 3000025});26
Writing a test
The test file should be located in the specs folder and named using the format test_name.cy.js (or test_name.cy.ts).
The test body (Cypress should create a template file using the method I described above).
JavaScript
1describe('Page tests', () => {2 beforeEach(() => {3 cy.visit(URL);4 cy.wait(4000);5 })67 it('Test block', () => {8 })9})10
The beforeEach() function allows you to perform the specified actions before each test block.
There is also the before() function — the actions inside it are executed only once at the beginning of the test.
You can explore Cypress capabilities here: https://docs.cypress.io/api/table-of-contents
Capabilities
Below are some Cypress commands and features that I found particularly useful while working with it:
Checking that a button is disabled
cy.get('button').should('be.disabled')
cy.get('button').should('not.be.enabled')
There is also another approach that I haven't tried yet:
cy.get('button').invoke('prop', 'disabled', false)
Checking that a button is enabled
cy.get('button').should('not.be.disabled')
cy.get('button').should('be.enabled')
Checking the number of elements
To verify that the number of elements is greater than a specified value (for example, 0):
cy.get(“tr”).its('length').should('be.gt', 0);
Getting an element's attribute and working with it
JavaScript
1cy.get('tr').invoke('attr', 'data-value').then(val => {2 expect(+val).to.be.eq((amountValue + 0.01))34 if(+val > 1) {5 some…6 }7 })8
The .then() method can be used to work with more than just attributes.
For example, you can use it to work with the element count.
JavaScript
1cy.get(tr).its('length').then(len => {2 if(+len > 0) {3 Some…4 } else {5 }6}7
Checking an attribute value
cy.get(a').invoke('attr', 'href').should('eq', 'some url');
cy.get('button').should('have.attr', 'aria-disabled', 'true')
cy.get('button').should('have.attr', 'aria-disabled', 'false')
Interacting with hidden elements
The { force: true } option allows you to interact with an element even if it is hidden or covered by another element.
Click:
cy.get(“button”).click({ force: true });
Type text into an input:
cy.get(“input”).type("some text", { force: true });
Function for reading the path
JavaScript
1expectLocationByPathname(pathname) {2 cy.location().should((loc) => {3 expect(loc.pathname).to.eq(pathname)4 })5}6
Determine whether an element is visible
cy.get(“button”).should('be.visible');
Determine whether an element is hidden
cy.get(“button”).should('be.hidden');
Verify that the text is correct
cy.get(‘h1’).should('have.text', "Some title");